Live tracking with Livelox GPS 4G trackers
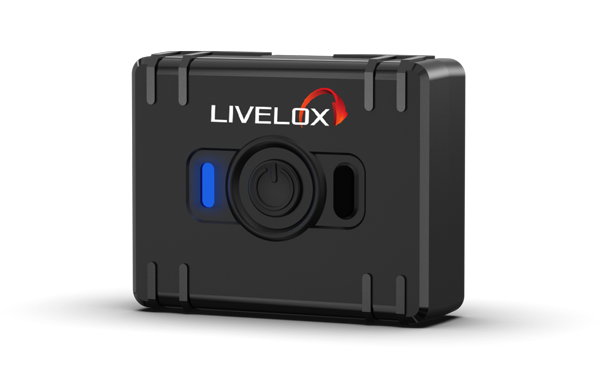
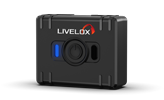
Our GPS trackers are manufactured by Teltonika. Their ATC700 model gives you and your club access to simple and flexible live tracking. Read more about our offer here.
This page contains information about how our trackers work and how to connect them to participants in Livelox events.
For information about the legacy Teltonika TMT250 2G tracker, follow this link.
Livelox user manual for Teltonika ATC700
Note! These instructions apply to Teltonika ATC700 trackers provided by Livelox. Trackers of this model from other suppliers or stores are not programmed to send positions to Livelox and therefore do not work with Livelox.
Usage
- Start the GPS tracker by pressing the button for two seconds. The diode shows a green light for a second.
- When the blinking pattern of the diode is yellow-off-yellow-off-blue, satellite signals have been found and position recording is underway.
- A red blinking diode indicates low battery level.
- Switch off the GPS tracker by pressing the button for seven seconds, then release it. The diode shows a steady red light for five seconds before being switched off.
Charging
- The GPS tracker’s rechargeable battery lasts up to 9 hours before it needs to be recharged. You can check the current battery level at
www.livelox.com/devices/status/trackername, where you replacetrackernamewith the number on the white label, for examplewww.livelox.com/devices/status/L001. Note: The battery level shown represents the last value received by Livelox and may differ from the actual battery level. - The tracker is charged using the supplied USB‑C cable. Remove the small rubber cover next to the on/off button to expose the USB charging port and connect the cable.
- If the tracker is switched on during charging, the same diode pattern as during recording is shown. Trackers that are switched off show a pulsating yellow diode while charging, and a steady green light when fully charged.
Alarm
- The GPS tracker can be configured to send an alarm via SMS to any phone number. Read more about alarms in the settings section further down this page.
Practical tips
- Turn on the GPS tracker about five minutes before the start of your race. If possible, stand in an area with a good view of the sky and hold the tracker in your hand. Stand still for a couple of minutes so the tracker can calibrate accurately against the satellites, resulting in high positional precision.
- Place the GPS tracker in a pocket or similar, with the blue side facing away from the body. Make sure the pocket is securely closed.
- Turn off the GPS tracker immediately after finishing.
- The GPS tracker is dirt‑ and water‑resistant.
Connecting GPS trackers to participants
When the tracker is delivered, it is either linked to a specific person or to a specific club, depending on what was specified when ordering. This constitutes the tracker’s permanent link and can be adjusted if needed.
In order for a GPS tracker route to appear in Livelox, the tracker must be linked to a person and a class in an event (training or competition) entered into Livelox. How this connection is made depends on the situation. In some cases, it is done automatically; in others, manual action is required. Below are the most common scenarios.
The GPS tracker is connected to you as a person
- If the Livelox event is connected to an external event management system such as Eventor, and you appear in the start list, the GPS tracker’s route will be automatically linked to you in the correct class. No action is required.
- Otherwise, search for the event and click Manage tracking devices. Then click Add my tracking device followed by Save.
- If the tracker has not been connected automatically or manually, it can sometimes be connected automatically once the route recording has finished. To enable this, all controls on the course must be visited, and the route may only match one class in the event.
The GPS tracker is linked to your club but not to a person
This setup is recommended when trackers are shared by different people at different events within a club. As a club member, you can connect any of the club’s trackers to participants in an event. These connections apply only to the current event.
- To connect a tracker to yourself, search for the event and click Manage tracking devices. Click Add me, enter the designation shown on the tracker’s white label (for example, L001), and click Save.
- To connect a tracker to another participant, search for the event and click Manage tracking devices, then Add new participant.
- If the participant is listed in Eventor, choose Add participants from Eventor and select one or more participants.
- Alternatively, enter the participant’s name manually by selecting Add new participant.
- Enter the designation shown on the tracker (for example, L001). Repeat until all participants are connected, then click Save.
The GPS tracker is not linked to your club
Follow the same procedure as when adding a participant linked to your club but not to a specific person. If you administer the event, you may add trackers with any designation—they do not need to belong to your club.
GPS tracker information and settings
You can view information and manage settings for trackers permanently linked to you or your club. You must be a club administrator to manage club‑linked trackers. For Eventor‑connected clubs, the administrator role is inherited from Eventor.
- Create a shareable live‑tracking link for a tracker
- Add up to three phone numbers to receive SMS messages when the alarm is activated
- View last active time, position, and battery level
- For club‑linked trackers, assign a permanent link to a club member
- To manage a personal tracker, go to your user profile and select the tracker under Tracking devices
- To manage club‑linked trackers, go to your user profile, click the club name under Clubs, then select Manage next to Tracking devices linked to the club
Alarm
The tracker can send alarm messages via SMS. For participants with limited orienteering experience, this provides a safe way to call for help if they become lost. Up to three alarm phone numbers can be configured per tracker.
To trigger an alarm, press the tracker button twice within one second. The tracker diode shows a red pulsating light for six seconds. An SMS containing tracker details, participant name, and a link to the position is typically sent within about ten seconds. If the event map and routes are not public, the position is shown in Google Maps instead of the Livelox map.
 Unser neues, zukunftssicheres Tracking-Modell bietet noch höhere Präzision und längere Akkulaufzeit. Die optimale Wahl für Live-Tracking beim Vereinstraining – jetzt direkt im Online-Shop bestellen.