Record routes
Topics
- Record a route directly with the Livelox Recorder app
- Record a route with a dedicated GPS tracker
- Automatically synchronize with Garmin Connect, Polar Flow, Suunto or Coros
- Upload a route file
- Draw your route by hand
Routes can be added to Livelox in a few different ways:
- By using an app in your smart phone that you carry with you while you run. This way is the simplest method, as you don't have to do any manual uploading afterwards.
- By using a dedicated GPS tracker. We sell and rent trackers.
- By synchronization with Garmin Connect. Workouts that are in your Garmin account are automatically transferred to Livelox.
- By synchronization with Polar Flow. Workouts that are in your Polar account are automatically transferred to Livelox.
- By synchronization with Suunto. Workouts that are in your Suunto account are automatically transferred to Livelox.
- By synchronization with Coros. Workouts that are in your Coros account are automatically transferred to Livelox.
- By using a third-party synchronization application. If your GPS watch is not directly supported by Livelox, a third-party application may be able to automatically synchronize your workouts. Check our Partners page to learn more.
- By uploading a file in a GPX or TCX format. Download the route from your GPS watch after your workout. Create a file for the route that you upload to Livelox.
- By drawing the route by hand. If you don't have a smart phone or GPS watch you can draw your route directly with the mouse.
Read more about each of these ways below.
Record a route directly with the Livelox Recorder app
The Livelox Recorder mobile app is available for both Android and iOS.
Get the app
Follow the instructions below to download the app and log in.
-
Download the app from Google Play or App Store. Search for Livelox Recorder. The icon looks like this.


- Start the app.
- Accept the terms and conditions.
- The log-in page is shown. Fill in your Livelox username and password, and click Login.
- Now everything is ready for recording! This procedure only needs to be done once. Now you can continue to the third bullet in the list Record a route below.
Record a route
It is simple to record a route. This is how to do it:
- Make sure that your phone is charged. A one hour recording into Livelox takes approximately 10-20% of a fully charged battery.
- Start the Livelox app. If you have followed the instructions above, you will come directly to the recording mode with your name filled in.
- For the best accuracy, hold your phone still in clear view of the sky for a few minutes. This will help to calibrate your position with the GPS satellite signals.
-
Click on the Start recording button at the bottom. The time starts to begin. Now you can quickly press the telephone's on/off button so the screen turns off.
- Place your phone in some kind of water resistant case. A small plastic bag is usually good enough. Place the phone somewhere it can be during the whole training pass such as in a arm band or in pocket. The higher up, the better signal connection and accuracy.
- When you are finished with your run, go back into the Livelox app and click on the Stop recording button.
To review a route you recorded, go into the Livelox start page and search for it. Read more how you do that here.
Record a route with a dedicated GPS tracker
Our simple-to-use GPS trackers are available to buy or to rent. Press the start button and you are ready to go!
Automatically synchronize with Garmin Connect, Polar Flow, Suunto or Coros
Automatic synchronization is the smoothest way to get routes from a GPS watch into Livelox. Read more about how to connect your Livelox account to Garmin Connect, Polar Flow, Suunto, or Coros.
Upload a route file
If you can't use automatic synchronization, there is an option to upload route files.
Draw your route by hand
If you have not recorded your route with a phone or GPS watch you can still load it into Livelox. You draw your route with the help of the mouse. Make sure that you are logged in and go to viewing mode for the class you want to add the route to. To the right of the heading Event there is a menu icon: . Click on it and choose Add a route. Choose a person to draw the route for and click on Draw in route by hand.
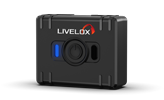 Our new, future-proof tracking model delivers even better precision and battery life. The obvious choice for live tracking - order it directly from the online store.